Why vote?
People have asked me many times since we started our blog why we decided to let other people make decisions about our home instead of just doing it ourselves. It’s a good question and we have a number of answers. One is, as we have said before, we don’t love making decisions ourselves and this takes that burden away. Thank you for that, dear readers and voters! Another is, someday we will want to sell this house (more on when “someday” might be in this post) and the more opinions we get from all of you, the more likely we are to consider every opinion of a potential buyer. Another is, as personal as home decisions may be, there are many people who read this blog who have experiences and/or training that I do not have and they are kind enough to share ideas and knowledge that I wouldn’t have access to without this forum. I am SO grateful for that. That said, whether you are formally trained in something design related, have experimented with your own house, or just spend a lot of time watching HGTV- we value your feedback and opinions so much and hope that you will keep sharing them with us.
When I look at some of the big decisions you have all helped us make in our home, I don’t just remember myself and Ronan creating those areas. I also remember all of the comments and suggestions that many of you shared on that project and that makes me feel like we have friends and family with us all of the time. That probably sounds kind of hokey, but it’s true. It feels like creating these spaces is a big community event and I love that so much.
The last reason that I really like sharing these decisions with all of you is because it often challenges us in ways that we probably wouldn’t be challenged without this blog. The last poll which asked whether or not we should add paint/wallpaper to the wall behind our son’s bed is the latest example of this. I had played around with the idea of doing something to that wall for about a year now. I mentioned it to Ronan a few times and he was open to it too, but it was never a project that seemed like a priority (because there are a few rooms left in this house that still scream “I have holes and cracks in me!! I AM YOUR PRIORITY!”) so it probably never would have gotten done. I would bet that 99% of the people reading this can relate to that sort of project. I would have continued to fantasize about the potential of the wall, but I would have reminded myself that it was fine the way it was and that we had bigger fish to fry.
Enter stage left: your vote to add paint/wallpaper. Although the poll ended up being a pretty close one, the decision to add something to the wall won and it became clear that the white wall wasn’t long for this world. I immediately began exploring our options. I had seen a few really beautiful wallpaper designs when we were researching for our daughter’s room, but they were more expensive than anything we wanted to spend on this sort of project. Then, I considered painting the wall all one solid color or even only painting under the loft, but I couldn’t decide on a color that I thought was perfect. Unable to make a decision, I turned to our Instagram account and conducted a poll so that I could avoid making the decision altogether to determine if you all wanted to help us make the decision of how to finish the wall. You voted for us to suck it up and decide something for once surprise you, so it was back to the drawing board!
Big Decisions
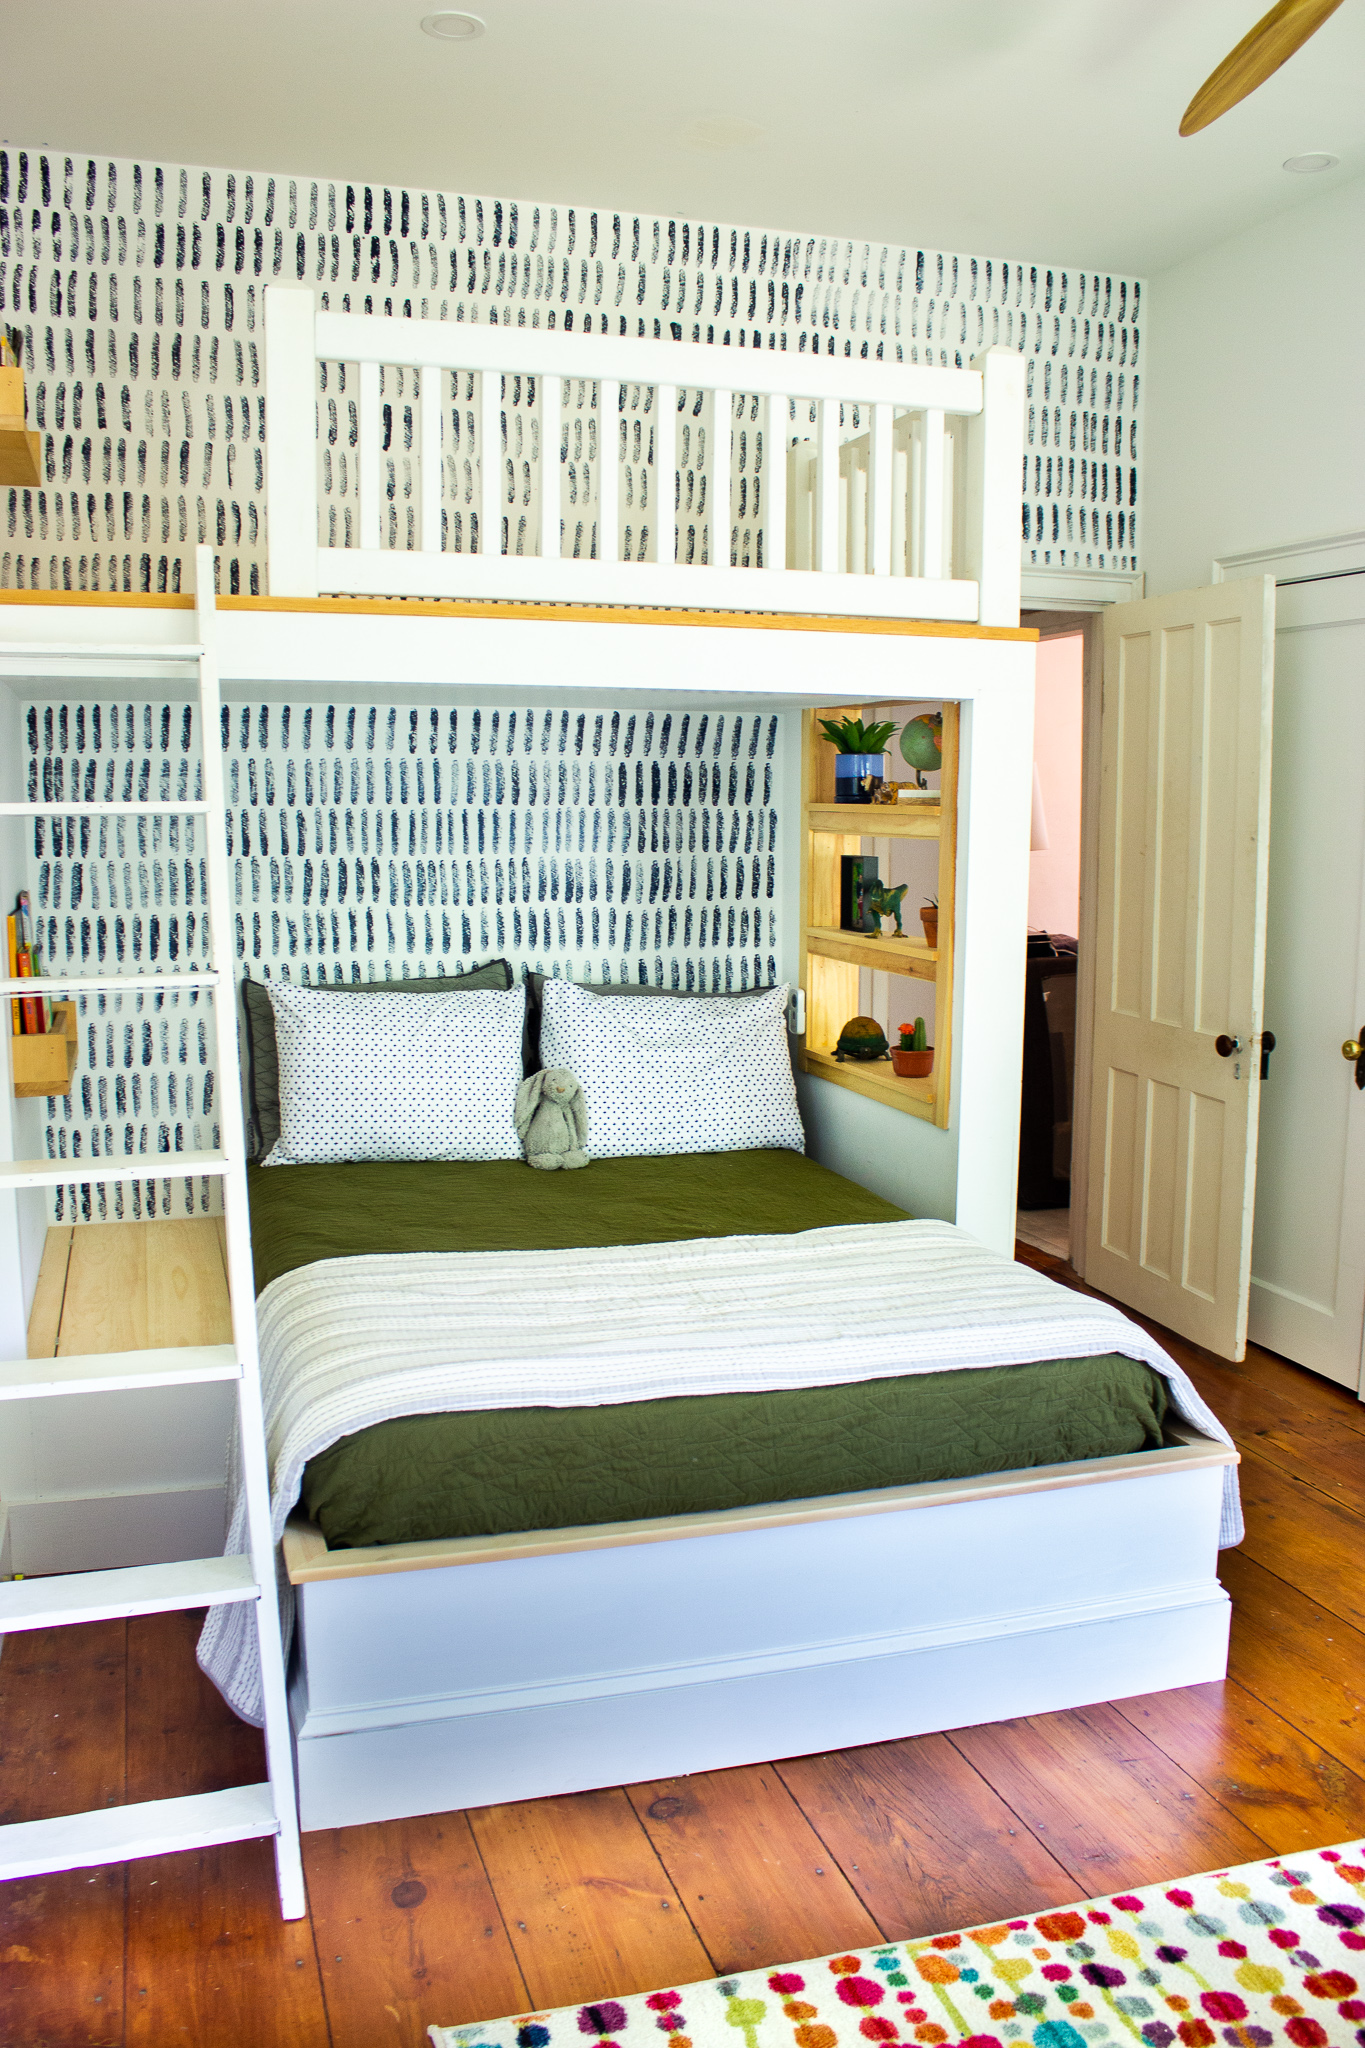
On Monday, I decided that I should order a stencil from Etsy so that I could put a cool design on the wall with some paint and leave the background white. It was an affordable option and it felt like I couldn’t mess it up too badly. I was all ready to buy it when late Monday night, while checking out some of my favorite bloggers Instagram accounts, I stumbled upon the best option yet: sponge painting! Not the 1995 version of sponge painting (I’m looking at you, terracotta-colored walls in every kitschy Italian restaurant in the world), this kind of sponge painting is different (fast forward 25 years to someone making fun of exactly the type of sponge painting I am raving about now…)
The next morning I woke up and gathered all of the materials that we needed: two kitchen sponges, some old leftover blue paint, and painter’s tape. That was it! As soon as my daughter fell asleep for her first nap of the day, I got to work. I was SO excited!!! After the first row was applied, I didn’t love the way it looked. I thought about turning back. Even my 5-year-old was unimpressed, but we decided to continue on! By the time I was five rows in, we were into it. I finished the whole area under the loft during my daughter’s nap (it took about an hour from set-up to clean-up and I do this sort of thing very, very slowly so it would probably take a normal person half of that amount of time?) then debated whether to do the rest of the wall. My son and I thought we should and I texted a picture to my art teacher friend (whoops, still not making decisions by myself!) who reminded me if I did the rest of the wall and didn’t love it, we could always just paint over it. That was all the encouragement I needed. So during my daughter’s afternoon nap, I did the rest of the wall.
Usually, I have to live with big changes like this before I decide how I feel about them, but this time I knew right away that I loved it. My son and husband also really like it and they are TOUGH customers. Our baby likes to run around in the loft and smack each of the little sponge marks which keeps her busy for a while and for that I am thankful. Here are a bunch of pictures of the project from start to finish.


Thank you, thank you, thank you for voting to make this wall into something fun! I think that we will continue to keep things in our main living area fairly neutral and minimal (see: grey and white), but we do not regret taking these risks upstairs in our kids’ rooms at all. We still have a laundry room, a bathroom, and our own bedroom upstairs to experiment with and I can’t wait to get more fun ideas from all of you! As we said, without all of you we would be wayyyyyy boring and not at all motivated to do any of this work less adventurous!
OH YEAH, if you sent us ideas and pictures of what you wanted to see happen on this wall and those ideas are not the option we went with, please don’t stop reaching out on future projects! We heard you! It was so amazing to have tons of resources to refer to thanks to the photos and ideas you sent. I think of this final product as a collection of all of the ideas you gave us mixed together until we found the perfect answer. Thanks again, everyone!!
-
Looks so great you guys! Awesome job! Glad you didn’t give up on the design when you first started!


1 Comment